
I decided to use that easy, go-to block, the half-square triangle, to create a flying geese quilt. I used the same technique described in my post Half Square Triangles . After sewing 2 squares together and cutting them into 2 half-square triangles, I simply turned them into the flying geese position and joined the 2 blocks together. Now, technically, that's not a proper flying geese block. The flying geese blocks that form the border are sewn in the traditional manner - 1 isosceles triangle with 2 right triangles joined in the corner to form a rectangle. But my half-square triangle technique is quick and easy. The only thing I wished I had done differently was to get my directional fabrics going in the same direction when sewing the isosceles triangle. I could have done this by making 2 sets of matching half-square triangles and then matching up the directional fabrics that were going in the same direction. (Oh, well, next time.)
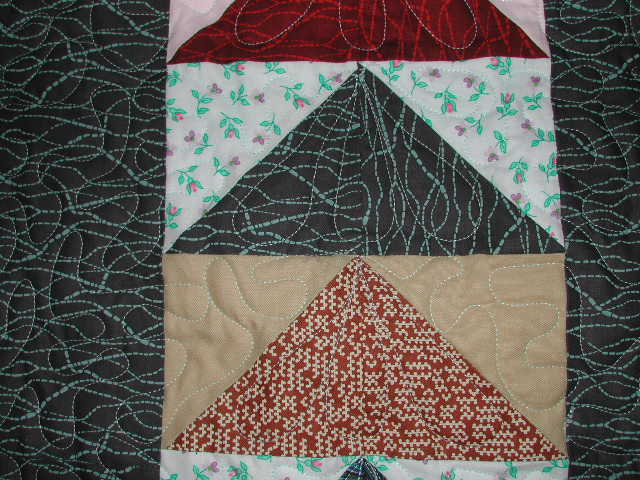 |
| Notice in the dark isosceles triangle the squiggly lines are at right angles with each other. It's a small detail, but I should have made duplicate half-square triangles and arranged the pieces so that this did not occur. |
I was careful to make sure all the leading strips and borders - and even the binding - had the squiggly lines all going in the same direction. It's something you might not notices now so much, but you sure would have if some of them had been at right angles. It would have really detracted from the quilt.


The quilt still seemed to need just a little something, so I decided to hand applique "flying geese" in the outside leading. I searched the internet until I found a small picture of geese flying in a V formation. By grapping that image and expanding it to the size I wanted, I was able to print off patterns of my geese. I then traced the shapes onto freezer paper before cutting them out (with about a 1/4 inch seam allowance). I appliqued them onto the leading before quilting the top. I even outlined them with embroidery floss, since my DH didn't think they were very "bird-like". I usually applique with the needle-turn method, and that's how I did these. These birds were not easy to do because of all the points and corners. Curves of any kind are always easier to applique than corners.

Then it was off to my local quilt shop where they let me rent their long-arm quilting machine. Creekside Quilt Shop in Arcade, NY gets a shout-out from me because they have always been so helpful in this department. I still machine quilt a lot of my work at home with my regular sewing machine, but for larger quilts it's just so much easier to use a long-arm quilter. These are very expensive machines; I don't believe I can justify having my own. Creekside Quilt Shop will teach you how to use the machine, and then provides stand-along support every time I come in to rent their machine. Super! I needed a little help (as usual), and one reason was that I was trying to use a very old batting (came out of my mother-in-law's sewing stash). This batting was meant for hand-quilting, and was very stretchy and fragile. (Recycle is my middle name.) We made it work, and now that it's all sandwiched in the quilt, it will be fine.
All that was left for me to do when I got home was to trim and bind the edges. The "Flying Geese" quilt is done. I believe it's destined as a shower gift; it probably needs a couple pillows made to match. It was really a fast and pretty easy quilt to put together. The only part that took a little extra time and care were the appliques. I've heard a few flocks of geese returning to our neighborhood in the last week. I'm watching anxiously for the spring weather to follow.

Nice quilt, Charlotte! I love reading about your process and what you've learned, what you feel could have been better, what you thought went well. Is there a quilter out there who doesn't learn something every time they make a quilt? I think that's what keeps me interested and progressing. So thanks for taking us along on your journey.....
ReplyDelete