Tuesday, September 27, 2011

Quiltmaker's "Back to School" Quilt

I happened onto a fun quilting blog published by Quiltmaker magazine. (http://www.quiltmaker.com/blogs/quiltypleasures/) In September, they presented a "Back to School" quilt, and gave directions day by day for a week.  It was a cute pattern, and I thought the daily directions might be just the motivation I needed to quickly get a quilt made for my family Secret Santa.

The first thing I did was shop my fabric stash to see if I could come up with fabric I already had to make this quilt.  Actually, I came up with several options.   
I could go with a Christmas theme.

Oranges and turquoise would make a fun combo.

Or red, pinks, and greens would make a classic beauty.

I decided on the third grouping (reds, pinks, and greens) for several reasons.  I liked not only the contrast in values of the fabrics, but also the scale of prints seemed right.  There was just enough of the large scale floral to make center blocks.  The stripe added the contrast needed to make the other fabrics come alive.  And, finally, I know this palette will go with the decor of its recipient.

I very much enjoyed this project. My assignment was just enough to complete and stay up with the daily directions.  It's a simple design, but the applique petals give it pzazz. I always want to put my individual stamp on my projects, and I did it this time with the borders.  The directions called for just 2 rather plain borders.  I added 3 borders + a binding that looks like a 4th border.  It was my idea to add squares and petals to the border corners, and I think that really helped carry the design all the way to the edges. 


I used a solid coordinating green for the backside (It also came from my stash!).  Starting in the center and working my way outward, I quilted it using free-motion quilting on my machine.  The quilt was a good size for this; any bigger, and it would have been a struggle.  The solid fabric on the back really shows off the quilting.  I'm pleased with the results and can check 1 Christmas present off my "to-do" list.

The finished "Back To School" quilt.

Friday, September 23, 2011

Pentleton Wool Quilt

During the 1980's my mother and father-in-law took a trip to the state of Washington to visit their daughter and son-in-law who lived there at the time. My mother-in-law was an avid seamstress, so while there she made a visit to the nearby Pentleton Wool Outlet.  It must have been just like a treasure trove for her, because when I cleaned out her sewing stash I found yards and yards of beautiful Pentleton wool. If you have not heard of Pentleton wool, you need to check out their website (http://www.pendleton-usa.com//home.jsp?=&prid=googlebrandLE&gclid=CI7Z4NzSs6sCFZAAQAodcir9gA) and blog (http://pendletonblog.wordpress.com/).  The Pentleton name has long been known for high quality (and pricey) wool garments. 

Now, what to do with all this beautiful fabric?  I just don't do much garment sewing anymore.  Could I use some of it in a quilt?  I spent the summer pondering this. 

Several questions needed to be addressed before I even got started.  Was this washable wool?  I thought at least some of it was, but I decided to wash all of it in hot water and to dry it in the dryer.  If it was going to shrink, or even felt, I wanted it to do it now before I sewed with it. And I was right.  Most of it came through the washing beautifully.  There were 4 pieces that did shrink significantly, but I'm okay about that.  Now I know what I'm dealing with.

Next, what design would highlight this fabric?  Which fabric patterns could work together?  My goal was to use what I had, and to highlight the beauty of the wool.  In the end, I choose 3 earthy plaids that seemed to coordinate with each other.  As beautiful as these were, I thought they need something more to add contrast.  I had some solid black and red.  I decided to use these as contrast fabrics. I wanted large chunks of the plaids, so I decided to make a very simple block with triangle corners.  By working it out on graph paper first, I managed to have the triangle corners form alternating red and black diamonds. At first I didn't want any borders, but in the end I decided a border at the top and bottom that repeated the quilt diamonds gave the quilt just enough detail to make it interesting. 

Who was the quilt for?  My mother-in-law - of course.  She's now in a nursing home, but her mind is good, and I'm hoping this quilt will bring back some very happy memories.  I decided I wanted flannel on the backside.  Soft and warm.... it seemed appropriate to pair with the wool.  Of course, I pre-washed and dried the flannel also, since it will get some heavy-duty washings in the nursing home.

Once the quilt top was put together, I had to decide how to quilt or tie it.  I thought about using a long-arm machine and quilting a rather large all-over pattern.  But I decided, instead, on hand quilting in and around each diamond, and then adding large buttons (again, from my mother-in-law's supplies).  The hand-quilting is done with 3 strands of embroidery floss and rather large stitches.  That and the buttons are enough to hold it all together, but loose enough that, again, the fabric takes center stage.  The busy pattern of the flannel on the back hides the hand stitches; they hardly even show on the back.

Finally, a simple black cotton binding finishes off the edges.  I'm happy with the resulting quilt. I'm pretty sure my mother-in-law will love it.  My only conundrum is that I still have lots and lots of wool....  There are probably more wool quilts in my future.


The finished Pentleton Wool Quilt
 

Sunday, August 28, 2011

Baby's Favorite?

Super-Sized Square-on-Point
I am entering "Baby's Favorite Blanket" contest. You won't find rules or regs for this contest anywhere, but you know when you've won by the bedraggled blanket that Baby drags around wherever she goes for 2 or 3 years (sometimes even longer).  Grandchild number 5 is due to arrive next December, and even though I have not won this contest with any of the first 4, I'm trying again with a new approach. 

I've learned that looks are not that crucial; it's the feel that wins every time.  My blanket entry this time is flannel - both front and back.  I used a very simple design from Anita Grossman Solomon as shown in the September/October issue of "Quiltmaker". It's called Super-Sized Square-On-Point.  I've worked with flannel before, and know that it can easily stretch out of shape.  That's why I wanted to keep the design as simple as possible. 

Monkey is cut from brown, pink, and white fleece scraps. The face is a simple machine stitch.
Solomon shows a quick way to cut the square and triangles from 1 1/4 of fabric. I tried to follow the simple directions, but still found I made a silly mistake on my first cut.  Pay attention to how she folds her fabric, especially in regard to where the fold edges are.  I had to stitch my hounds-tooth square together down the middle because of my cutting error.  Oh well.  I added my own touch by appliqueing a fleece-pieced monkey on this side and that helped cover my "error". I also used this same square-on-point on the backside.  Solomon doesn't do this, but I'm not sure why since the left over fabric from the front is already to make the same design in reverse for the back.

I wanted to use free-motion quilting on this blanket, but was wary of the flannel stretch factor.  First I safety-pinned my three layers together smoothing as I went from the center outward. I used a high-loft polyester batting instead of my usual low-loft cotton batting because I was going for soft and fluffy. Next I decided to try using a large embroidery hoop to hold the layers firmly in place while free-motion stitching.  Yes, it solved the flannel stretch problem, but for some reason stitching in the hoop made my machine's tension go berserk.  Maybe I could have played with loosing the lower tension, but I try to avoid tension issues like the plague, so I got rid of the hoop and simply did free-motion like I usually do with safety pins holding everything in place. I kept a somewhat large stitching design, and it seemed to come out fine.

Because I was still focused on the feel of the blanket, I wanted to add a silk blanket edge.  I decided to use cotton seam binding on two opposite sides, and add the satin edging to the top and bottom edges. I hand basted the satin edgings to the blanket first before using a decorative stitch to secure them. That way I didn't have to worry about the underside staying in position as I machine stitched.

Ta-Da!  Not a complicated baby quilt; and I am happy with the feel.  The flannel is very soft, the monkey is fuzzy, and the satin edge is smooth and slippery. So here's my latest entry in the "Baby's Favorite Blanket" contest. Who knows? Those babies have a mind of their own...

Friday, March 25, 2011

Flying Geese

I'm pretty pleased with the results of my latest quilt.  It's not a hard design; it's a spin on the flying geese block pattern.  It was actually inspired by some charm blocks I purchased from Connecting Threads.  I really liked the colors and patterns of the fabrics, and best of all... they were on sale.  So what to do with my 4 bags of 5 inch pre-cut squares? 

I decided to use that easy, go-to block, the half-square triangle, to create a flying geese quilt.  I used the same technique described in my post Half Square Triangles . After sewing 2 squares together and cutting them into 2 half-square triangles, I simply turned them into the flying geese position and joined the 2 blocks together. Now, technically, that's not a proper flying geese block. The flying geese blocks that form the border are sewn in the traditional manner - 1 isosceles triangle with 2 right triangles joined in the corner to form a rectangle. But my half-square triangle technique is quick and easy. The only thing I wished I had done differently was to get my directional fabrics going in the same direction when sewing the isosceles triangle. I could have done this by making 2 sets of matching half-square triangles and then matching up the directional fabrics that were going in the same direction. (Oh, well, next time.)


Notice in the dark isosceles triangle the squiggly lines are at right angles with each other. It's a small detail, but I should have made duplicate half-square triangles and arranged the pieces so that this did not occur.


I was careful to make sure all the leading strips and borders - and even the binding - had the squiggly lines all going in the same direction. It's something you might not notices now so much, but you sure would have if some of them had been at right angles. It would have really detracted from the quilt.

The quilt still seemed to need just a little something, so I decided to hand applique "flying geese" in the outside leading.  I searched the internet until I found a small picture of geese flying in a V formation. By grapping that image and expanding it to the size I wanted, I was able to print off patterns of my geese. I then traced the shapes onto freezer paper before cutting them out (with about a 1/4 inch seam allowance). I appliqued them onto the leading before quilting the top. I even outlined them with embroidery floss, since my DH didn't think they were very "bird-like". I usually applique with the needle-turn method, and that's how I did these. These birds were not easy to do because of all the points and corners. Curves of any kind are always easier to applique than corners.

Finally I was ready to put this whole thing together.  I chose a large print that matched one in the charm pack for the backing.  I like to use big prints or something unusual for the backs of my quilts. I like there to be a pleasant little surprise when you flip them over. This print seemed to do the trick for me.

Then it was off to my local quilt shop where they let me rent their long-arm quilting machine.  Creekside Quilt Shop in Arcade, NY gets a shout-out from me because they have always been so helpful in this department. I still machine quilt a lot of my work at home with my regular sewing machine, but for larger quilts it's just so much easier to use a long-arm quilter. These are very expensive machines; I don't believe I can justify having my own.  Creekside Quilt Shop will teach you how to use the machine, and then provides stand-along support every time I come in to rent their machine. Super!  I needed a little help (as usual), and one reason was that I was trying to use a very old batting (came out of my mother-in-law's sewing stash). This batting was meant for hand-quilting, and was very stretchy and fragile. (Recycle is my middle name.)  We made it work, and now that it's all sandwiched in the quilt, it will be fine. 

All that was left for me to do when I got home was to trim and bind the edges.  The "Flying Geese" quilt is done.  I believe it's destined as a shower gift; it probably needs a couple pillows made to match.  It was really a fast and pretty easy quilt to put together. The only part that took a little extra time and care were the appliques. I've heard a few flocks of geese returning to our neighborhood in the last week.  I'm watching anxiously for the spring weather to follow.


Monday, March 7, 2011

Zipper Art


One of the larger projects I've been working on this winter is my "Zipper Art". Above is the wall hanging, I just finished this afternoon. I completed most of the squares on my trip to Texas. It was a perfect hand-work project, since I did not have my machine with me. It's taken me over a week to get it finished and put together, but that's because I put it together twice. I just wasn't happy with it the first time, so I took the squares apart and tried a second time.  I think I'll call this good enough. This one is available for shows and/or sale, since I've put my "keepers" in frames to display in the fireplace room.

Framed "Zipper Squares"

I also have 2 more zipper squares to frame for sale or show. It's been a lot of fun designing and creating these pieces. So much so, that I may continue for a while with new designs and varied frame sizes.

These pieces were inspired by the hundreds of zippers that came from my mother-in-law. I guess I should explain that a bit. In December, it was necessary to empty my in-laws' family home and get it ready for sale. My DH and his 4 siblings worked hard to honor, but pack up, give away, and distribute the things that made up 60+ years of living in their parents' family home.  Since none of them are "sew-ers", or even crafters, they asked me to clean out their mother's sewing room. My mother-in-law was quite the seamstress in her day. She had 1 room packed with every sewing accessory imaginable, and a whole other room packed to the ceiling with fabrics. I went through it all. I sorted, grouped, and tossed. It was like a sewing archaeological dig. There were patterns and supplies from the 1950's up and into the 1980's. There were yards and yards of fabric - mostly double-knit (Yikes!), but also including some very nice Pendleton wool.  There were bias tapes, laces, and seam bindings in every imaginable color. There were elastics, hooks and eyes, yarns, needles, threads, zippers and buttons.  In fact, I ended up with over 5 large tins of buttons, and over 200 zippers. Hundreds of buttons and zippers - some were new; some were recycled from old clothing. 


zipper bow or brooch
 Now, I almost tossed the oldest zippers away; they were used and metal.  I had them all sorted out into a trash bag, but at the last minute I thought, "Oh, come on. Try a little creativity." I checked the internet for ideas, and found Martha Stewart making some "zipper bows".  I tried a few of these - not too hard to do. They dressed up a few Christmas gifts, and 1 went on the side of my friend's new hat. While searching the internet for zipper bows, I happened upon some brooches made from zippers and felt. This got me to thinking. Could I incorporate zippers into a quilt block?  I drew up some ideas, bought a little brightly colored felt and gave it a try.


Fleece hat with red zipper bow.


Actually, I am pretty pleased with the results. I incorporated some of the buttons also, and hand embroidery dressed it all up. My technique improved with each square.

Here's some tips I learned:
  • Designate 1 pair of old scissors to cut the zippers, so that you don't dull all your scissors.
  • Fabric glue doesn't work well for basting because it's too hard to hand embroider over it.
  • Use transparent thread to baste the pieces and zippers in place before adding embroidery.
  • A needle threader is a must when working with transparent thread.
  • Knot both ends together when sewing with transparent thread or you'll just keep pulling it out of the needle.
  • Clip the zipper's tape every 1/2 inch to help it bend around curves.
  • The zippers lie much flatter on a concave curve than on a convex curve.
  • I used 3 strands of embroidery floss.
  • Make the squares just a bit larger than you want them,so that you can square them up when they are finished.
Here are some close-up shots that show some of the detail on these quilt blocks.

Thursday, March 3, 2011

Half Square Triangles

The half square triangle is a basic building block in many many quilts. Once a quilter learns this block, you will see it everywhere. It's like buying a new car. You never ever noticed Taurises on the road until you own one; then, they are everywhere. So is the half triangle.

It's one of my favorite blocks because it's easy to handle, easy to sew, and I can churn out lots and lots of them in a very short time. Here's my method:


I start with 2 squares. Size doesn't alter the sewing method. I like to end up with a square that's just a bit bigger than I need so that I can trim it to a perfect square before I move on to the next step in my quilt. In my example photos, I started with 4 inch squares and ended up with 3 5/8 inch half squares. That would work perfectly for me if I wanted 3  1/2 inch squares for my project.

Stack 2 squares right sides together.
Stich 1/4 inch from both sides of the fold.


Iron the squares in half diagonally. One square should be ironed right sights together and the other square back sides together.  Now I can easily stack my squares right sides together by fitting the creases into each other. I use my 1/4 inch presser foot to guide my stitching 1/4 inch from the fold. At this point I like to chain stitch several squares in a row. It's a quick sewing method and you needn't worry about backstitching at the ends of your stitching.  When I have a long chain of half triangle squares stitched on one side of the fold, I simply turn it around and stitch down the other side of the fold.

Chain stitching makes fast work of many blocks.
Cut apart on the fold.


Cut the blocks apart, and cut down each center fold. Iron open the square and there I have it - a half triangle square.  I always iron both seam edges toward the darker color; I'm not sure why, but it works out well most of the time.

The reason this block is so popular is that it can be arranged into hundreds of designs. Just by turning these 4 half square triangles I end up with very different designs. And if I added in squares or any other basic quilt shapes... well... the possibilities really are endless.


Here are 3 quilts in which the half square triangle block is used exclusively. They each turned out very different even though the exact same block is used in each one.

There is a little story behind these quilts. As I've already mentioned, my mom is an expert quilter. She lives in the Rio Grande valley of Texas in an over-55 community. One of the community groups she belongs to recycles fabric into quilts for hospitals and charity groups. Because they make so many, and they are group projects, the quilters work with basic 6 inch squares only. They throw away all fabric not large enough for a 6 inch square.  Now, my mother couldn't bear to see some of the nice fabrics thrown away just because they were a bit small, so...  I received a large bag of scraps. My fabric stash did not need increasing, and since these were such small scraps I didn't want to add them to my stash (which by the way, I keep sorted by color). I did think about chucking them (sorry, Mom), but instead took them out, and started slicing and dicing them into 5 inch squares. I then grouped them by color groups. Next came a marathon of sewing half square triangles. It wasn't until all my half square triangles were sewn that I started arranging and re-arranging on my design wall. Finally, I came up with designs that pleased me. These are truly scrap quilts - made from the scraps of the recyclers!


The half triangle square - an amazing block!

Tuesday, March 1, 2011

The Sister-in-Law Flower Garden

Where should I start?  New work... old work?  I've decided to start with one of my earliest quilts because of the history and story that goes along with it.  (And because it is still in my possession.)

I began this quilt back in the 1970's. I was in my 20's, already married. It was a very busy stage of my life; I had a pre-schooler and a baby, a farmer husband, and I was still finishing up my college degree. I wanted to make a quilt for my older brother and his soon-to-be-wife as a wedding present.

The basic design, or at least the flower blocks, came from a magazine - now long lost.  The flower blocks are hand-appliqued and then details were hand-embroidered with floss.  I figured I could work on it late at night in front of the TV. (That much has not changed in all these years. I still like to do hand work while watching TV. It fools me into thinking I'm not as much a  'couch-potato' as I really am.)
Anyway, I set to work, but did not even have the blocks finished before the wedding.  I can't remember now what I ended up giving as a wedding gift, but it wasn't the unfinished quilt. A few years later, my younger brother was about to marry, so I thought, "I'll finish the flower quilt for him."  More blocks were worked on until I finally had enough for the quilt, but again I ran out of time.  I just couldn't get it put together and quilted by the wedding day.

And so the flower blocks sat in a box for maybe 5 or 6 years, waiting for me to have the time to finish the quilt. Meanwhile, I'd had my third child, and a full-time teaching job at the neighboring public school. Most of my sewing efforts now centered on practical things like pj's and kid clothes.

Every so often I'd glance at the box with my flower squares and dream about finishing it. Finally, I decided that my older brother's wife should at least have the appliqued squares that were originally meant for them. After all she is a professional seamstress; she could finish the quilt. I wrapped the box of squares and gifted them to her. At least I didn't have to feel that guilty tug everytime I thought of them. My intentions were good, and so were hers, but 10 or so years later (!) she gifted those very squares back to me saying sheepishly that she just didn't have the time to work on it.

Well, by this time, my oldest was getting ready to fly the nest. I had a teenager and a 10 year old, and still my full time teaching career. But times were changing and my 24 year marriage to that farmer was ending. It was a time of great emotional upheaval, and there were really two activities that helped me keep my sanity. One was walking (I'd walk 5-10 miles up and down hills each time I went out. -Provided lots of meditation time ... or just a chance to scream into the wind.); the other was sewing. Sewing seems to soothe some need I have to create. It just makes me feel good. I began sewing again with a vengence. And the first project I did was to finish this quilt!


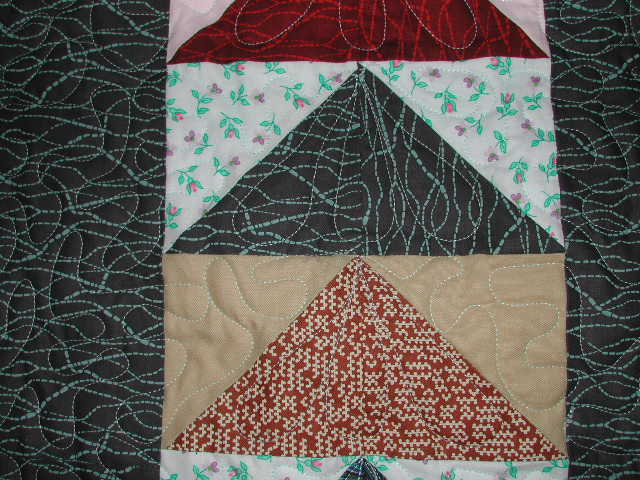
I chose a flower garden cotton print to frame the squares. It has faded some over the last 15 years. Dark green leading sets the squares off, and the borders make it large enough for a queen size bed. My mom is an accomplished quilter herself. (I learned my sewing skills from her.) Mom hand-quilted this quilt for me, and the neat small stiches look like love to me. Finally, after 20+ years, the Sister-In-Law Flower Garden quilt was completed. Now I just can't give it away. There's too much of my own personal history tied up in this quilt. I remember so many things everytime I see it. It's place of honor is on our guest bed to minimize wear and tear, while still having it out and being used.

I've made many quilts since this first one, but none that I've loved more. Part of the creation process is putting a piece of yourself into what's created. This quilt has some major chunks of me in it.

Monday, February 28, 2011

New Fabric Artist - Old Quilter

It's taken me a while and considerable introspection, but I have concluded that yes, I am an artist.  I work mostly with fabric, although I like to play in many mediums. I used to say things like "I like to sew" or "I'm crafty" or "I'm a quilter". These are all true, but not true enough. I love to create. I love to see things and make things that are just a bit different than everyone else. And I love to recycle. If I can reuse something, and end up with a piece that pleases me, I'm tickled to death.

I'm married to man who does not seem to have even 1 art gene in his make-up. He has many other good qualities, but can not find a reason or a use for art. "Why? " he asks. Even art in the form of a warm and snugly quilt gets a "Why don't you just buy a blanket?" from him.  That's OK; he tolerates my passions like I do his. (How can someone get so excited about a bouncing ball?) He's part of the reason I have never before referred to myself as an artist. (I can hear his groan even as I write this.) That, and the fact that I'm never 100% satisfied with my work. But I've decided that being an artist is mostly about the process.  It's the searching for beauty in our world, and the act of creating (or recreating) beauty. For me beauty is the means by which I can recognize and appreciate everything around me. So I'm making it official DH (Dear Husband) - I'm not just a sew-er, a quilter, a crafter; I'm a creator of fabric arts.

I plan to use this blog to share my projects. I'll do my best to add a lot of photos, and even some how-to's. I'd love to hear comments from you, the reader.  What do you like? What do you have questions about? Are you interested in any of my work?